Ubuntu Raring Upgrade Boring in a Good Way

I’ve messed with Ubuntu for 7 years now, and upgraded numerous machines for myself and relatives. I’ve played with alpha and beta versions and enjoyed each improvement in functionality and aesthetics. I found it most satisfying when upgrades went well but there were a dozen or so tricky tweaks required to get every last thing working. I’d blog about them. It’s kind of sad but those days seem to be gone – Ubuntu Just Works. And it works well – much better, in my opinion, than the Windows 7 system I use every day at work. It even looks better these days and I expect to be using Ubuntu for a very long time. So a big thanks to Canonical and the community for making it all happen. And just to be really clear, I love the polished Unity interface available in Raring and the direction Canonical is taking Ubuntu.

Raring Rocks

So I guess I had better switch my focus now to Ubuntu phone and start playing with that side of things. Hopefully, that will provide another 7 interesting years ๐Ÿ™‚

The Zareason Linux Laptop

I recently acquired a laptop from Zareason who have recently set up shop in New Zealand. You can see the details here. In short, I’m really happy with my Linux laptop. And although it’s a silly little thing to be pleased about, I like seeing the Ubuntu logo as my super key.

Ubuntu Super Key

Ubuntu system from HDD to SSD OS and HDD Home

I finally took the leap and changed from a HDD-only system to a machine running the OS (Ubuntu Precise) on a nice fast SSD (60GB) and the home folder on a 3TB HDD. I also took the opportunity to do a totally clean install of Precise to remove any cruft that had built up over all the upgrades from Intrepid onwards. The project was a success and took almost 1.5 days for every single configuration, cron job, package installation, theme tweak etc to be completed.

The benefits: 1) the system boots, runs, and closes down much faster. I didn’t think my system was slow before but I can never go back ๐Ÿ˜‰ 2) the system is presumably less buggy or complicated because all the years of experimental installations, repositories, etc are gone. System updates should also be more streamlined, and 3) the system/home split should make it easier to repair the system and otherwise manage it.

OK – now to the nuts and bolts as best I can recall them from my scribbled notes. What follows is a mix of what I actually did and how I would do it if doing it again ๐Ÿ˜‰

Format SSD to ext4

ext4 is a perfectly good choice – see Installing Ubuntu on a SSD so that’s what I chose.

I added the SSD to my system ahead of the existing HDD so it would be sda not b. That is because it is going to be the boot drive for the final system. It also provides a logic for the order chosen which makes it less likely confusion will result in the wrong disk being wiped.

Being only 60GB there was no problem using cfdisk for this purpose. The main thing was to correctly identify which disk was the one to wipe AND NOT TO WIPE THE MAIN SYSTEM BY ACCIDENT! Merely swapping a and b would be enough for a disaster. But of course you have a complete bit for bit copy of the original system HDD made using the dd command right ;-). The instructions at http://p-s.co.nz/wordpress/using-cfdisk-to-prepare-a-usb-hdd-to-store-backups/ are useful but remember to check the order. In my case I was wanting sda to be the SSD so I wanted to format sda NOT sdb in my case. The best check is the presence or absence of partitions as per the screen shot in the referenced blog post. The different sizes was a final check.

Install Ubuntu Precise onto SSD

At this point you may wish to physically remove your original HDD so there is no risk of installing Ubuntu onto the wrong device. Of course, you would never do anything so dumb but … OK, now you may need to enter BIOS during boot up and ensure you can boot from USB or CD (where your Ubuntu installer ISO is).

Now just install Ubuntu onto the SSD. It will be small (in my case only 60GB) so it should be easy to tell you are installing onto the correct device. Don’t worry that the installation is setting your home folder up on the SSD at this stage. We will change that over later.

Format 3TB HDD to ext4

Remove the old HDD if still there and put in the 3TB drive. Boot into the BIOS and change order or HDDs so you boot into the SSD not the HDD. OK – you’re in a clean install of Ubuntu. From here we can attach to the 3TB system and format it to ext4. Make sure you don’t have the 3TB system mounted before you try to format it or you won’t be able to. In my case there was the added problem that the brand new HDD had some junk installed on the first 100MB or so. If so, wipe that before doing a conventional format using parted (cfdisk is not available because of the disk size remember).

Note – since you have removed your precious original HDD there is no risk of accidentally destroying it with the next step. The worst that can happen is you mess up your SSD and have to reinstall Ubuntu on it (no big deal these days). But nonetheless, make sure you wipe the correct disk. In my case, the main boot system is sda (a is first is the logic) and the 3TB HDD is b. So if we run the following from the terminal on the SSD Ubuntu system we clean the 3TB HDD of manufacturer cruft:

sudo dd if=/dev/zero of=/dev/sdb bs=1M count=100

Being over 2TB in my case, we can’t use cfdisk to format what is going to be our home system. See Linux Creating a Partition Size Larger Than 2TB. Follow the instructions there. Don’t forget to run print at the end of the parted steps to check everything is OK. In my case I wanted ext4 so my final step was:

sudo mkfs.ext4 /dev/sdb1

Note: “b” is the HDD in my case because I have used “a” for my boot OS. Make sure you don’t mkfs onto the wrong drive.

Transfer fresh home contents to 3TB HDD

OK we now have two disks – SSD as “a”, and the 3TB HDD as “b”. We start by copying all the home contents from the clean install on “a” across to “b” so that we can use “b” as our home folder.

Some good instructions are in Partitioning/Home/Moving

Install packages onto SSD

The following list is for my benefit, but it gets across the idea that there are a lot of packages in play. For every package added there is probably another which got left behind by the clean install process.

  • synaptic (sometime makes installation easier if you know the packages you need)
  • cups-pdf (for printing to PDF)
  • bazaar (for development)
  • dh-make (for making deb packages)
  • python-nose (for testing Python code)
  • virtualbox
  • sqlite database browser
  • vlc (video and podcasts)
  • f-spot (photos)
  • php5
  • mysql (server and client)
  • php5-mysql
  • php5-xdebug
  • inkscape
  • shutter (for screenshots)
  • eclipse
  • netbeans
  • idle
  • gimp
  • k3b (disk burning – the only reliable way to avoid making coasters)
  • hardinfo (for getting system info)
  • gnome-utils (includes the brilliant Baobab visual disk usage utility)
  • dropbox
  • all the pre-reqs of my SOFA Statistics package
  • scheduled tasks
  • scribus
  • 7-zip (p7zip)
  • gFTP
  • samba (for shared folders)
  • wine (so I can install Windows program SQLyog I use for MySQL management and scheduled remote one-way syncronisation backups; and RegexBuddy)
  • Set up emblems, and added some very useful menu options such as open as root, set as wallpaper etc, as per Add emblems to Nautilusโ€™ Files & Folders in Ubuntu 12.04 & 11.10. Installs nautilus-actions-extra.
  • System load indicator and System monitor indicator (indicator-sysmonitor) for my panel. NB after adding ppa for alexeftimie manually change from precise to oneiric via the GUI (see original instructions in Things To Tweak / Fix After Installing Ubuntu 11.04 Natty Narwhal). Set both up so they start on startup
  • libreoffice-style-galaxy (then follow simple steps in [Solved] LibO Toolbar Icon choice?)
  • ttf-mscorefonts-installer
  • gnome-games-extra-data (and then set card theme in aisleriot to Paris

Extra Setup

  • Get PHP plugin for netbeans (had to make update centres active before I could access the PHP plugin)
  • Get NZ dictionary for LibreOffice (the OpenOffice dictionary is what you need)
  • Set up sharing on shared folders
  • I added a custom command to the Open With dialog as per Add custom command in the open with dialog? so that SQLite databases could automatically open with SQLite Database Browser. Did same with IDLE and python scripts.
  • Get PyDev (Note – use actual link not the initial link that redirects) and Pylint for Eclipse. Pylint was overly allergic to gettext’s _() and I managed to solve that by running PyDev>Code Analysis fresh. Not sure exactly what it was I did that solved the annoying problem of excessive error messages.
  • Fixed up minor dual monitor issue – see Could Not Apply The Stored Configuration For Monitors
  • Manually added bookmarks to Nautilus so that they appear as quicklists against Home folder on launcher.
  • Bring across old ~/.gftp folder with all bookmarks etc)
  • Got all my scheduled cron jobs going. Found old copy of text generated by crontab – e which had been saved as “paste into crontab -e.txt”. Pasted it back into crontab -e and wrote to file. The following explains why to use crontab -e How do I? Edit Crontab using a Script?
  • Set up apache so localhost refers to a different folder (in my case my projects folder), not /var/www. Use sudo gedit /etc/apache2/apache2.conf. Change DocumentRoot and the Directory setting for that path in /etc/apache2/sites-available

    DocumentRoot /home/g/projects
    <Directory /home/g/projects/>

  • Get xdebug working so we can debug PHP applications in netbeans. Edit php.ini (/etc/php5/php.ini) so that it has the following lines at the top by sudo gedit /etc/php5/apache2/php.ini:

    xdebug.remote_enable=1
    xdebug.remote_handler=dbgp
    xdebug.remote_mode=req
    xdebug.remote_host=localhost
    xdebug.remote_port=9000

    Check in /etc/php5/conf.d/xdebug.ini that the path is actually exactly correct (esp the date part of the path):

    zend_extension=/usr/lib/php5/20090626+lfs/xdebug.so

    Note: restart apache to see changes:

    sudo /etc/init.d/apache2 start
    sudo /etc/init.d/apache2 stop

    Or the following style does the same:

    sudo service apache2 start

  • To remove overlay scrollbar (I have a large screen setup so would rather have convenience than save screen real estate) sudo apt-get remove overlay-scrollbar, then go into synaptic and manually remove the appropriate liboverlay-scrollbar-n.n-n
  • To remove global menus as per Disable the Global Menu in Ubuntu 12.04 (Precise Pangolin)
    sudo apt-get autoremove appmenu-gtk appmenu-gtk3 appmenu-qt
  • Speed up GRUB (I set GRUB_TIMEOUT=2) and tidy it up re: left overs from when old HDD was attached
    sudo gedit /etc/default/grub

    GRUB_TIMEOUT=2

    sudo sudo grub-mkconfig (not sure if this is needed or if grub.cfg automatically created as part of next step anyway making it redundant)
    sudo update-grub

Transfer user files and extra config from original HDD

I attached the original HDD as a USB HDD. It was automatically mounted and I was able to copy across folders and files using the GUI. For larger jobs. If, for some reason, a large copying process is interrupted, I found it easy to use rsync to copy the resources across again).

sudo rsync -avr /media/<uuid of mounted USB HDD>/ /home/

Note: From the rsync man file:

A trailing slash on the source changes this behavior to avoid creating
an additional directory level at the destination. You can think of a
trailing / on a source as meaning “copy the contents of this directory”
as opposed to “copy the directory by name”, but in both cases the
attributes of the containing directory are transferred to the contain?
ing directory on the destination. In other words, each of the follow?
ing commands copies the files in the same way, including their setting
of the attributes of /dest/foo:

rsync -av /src/foo /dest
rsync -av /src/foo/ /dest/foo

Also see the brilliantly titled: Rsync: Enough Rope…

In my case I wanted the following:

  • Music (over 5,000 large files so it took a while)
  • Pictures (including photos so it took a while)
  • Projects (all my development work)
  • VirtualBox VMs and also .VirtualBox (massive files)
  • Misc (includes lots of legacy files)
  • .wine (several important programs including SQLyog and RegexBuddy)
  • .local/share/rhythmbox/playlists.xml (I would sorely miss these)
  • .ssh (otherwise launchpad/bzr push won’t work anymore)
  • Lots of settings files from mozilla firefox and thunderbird (brilliant – all my bookmarks, extensions, history, toolbar buttons, email accounts, email history) etc
  • .gnome/gnome-schedule/crontab (all the titles for my cron jobs – see Creating a Named Cron Job)
  • .dropbox (Note – I had to enter my email and password etc into the Dropbox dialog which popped up later so that it could refresh its connection)
  • .bazaar
  • MySQL – with root permissions copy folders and files from /var/lib/mysql. Will need to mass change owner and groups using
    chown -R mysql:mysql /var/lib/mysql
    I needed to operate in the command line for this as root IIRC – see RootSudo
    Need frms etc for MyISAM and idbdata1 for innodb tables. See Copying MySQL Databases to Another Machine but basically do lots of comparison and checking until everything is working. Check you can see tables of all sorts and all databases.

Ubuntu Precise Pangolin and Unity – I’m a Fan

Upgrading to Precise was by far the easiest Ubuntu upgrade I’ve ever undertaken. Almost everything Just Worked (VirtualBox, Netbeans debugging, Eclipse, SQLyog under Wine, Firefox, Thunderbird, ) and the only gotcha was that I needed to reinstall MySQL server (upgraded to 5.5). But that was very easy and all my existing local databases were there. My wife’s upgrade and the upgrade of the notebook also went very well.

My favourite changes:

A launcher on my second desktop so less far to move the mouse when working on the right-hand monitor:

Precise Desktop

Dash is much more useful – most of my tasks are 1 click away instead of 2:

Very useful Dash

Shortcuts are automatic:

Automatic Shortcuts

The HUD looks promising but I haven’t really given it a work out yet.

Verdict: very happy with the refinements to Unity and my best desktop experience ever.

Misc Interface Tweaks for Ubuntu 11.10

Adding custom launcher items

You can add a custom launcher in Ubuntu 11.10 by typing this in a Terminal

gnome-desktop-item-edit ~/Desktop/ --create-new

Once you have customized the item on your Desktop, drag it to the Launcher.

How do I add a custom launcher?

Actually, I created the shortcut to another location that I wouldn’t want empty (I keep my Desktop as clean as possible) because otherwise my launcher icon failed once I deleted the desktop icon.

Restoring the ability to add emblems in Nautilus

Add emblems to Nautilusโ€™ Files & Folders in Ubuntu 12.04 & 11.10

The ppa has changed since all the blog posts explaining it but you get a message like this:

This PPA is obselete
please use either
______Daily build PPA
ppa:nae-team/daily
______Official Release PPA
ppa:nae-team/ppa
More info: https://launchpad.net/~dr3mro/+archive/nautilus-actions-extra

and it is easy to make the modification. I used ppa:nae-team/ppa

Upgrading to Ubuntu Oneiric

This post isn’t so much aimed at helping others (although maybe it will) as making my next upgrade easier. The intention is to add every tweak etc as I do them or remember them.

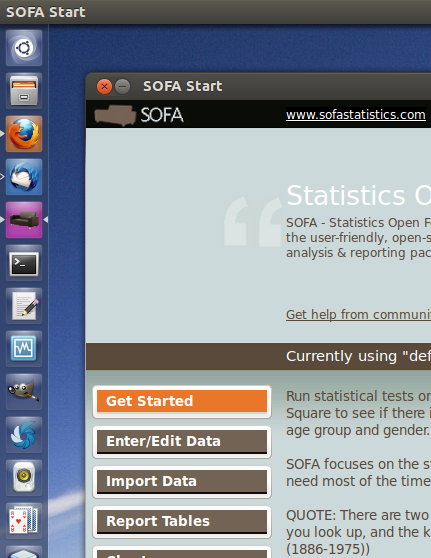
Here is what it looks like:

Unity on my dual monitor

Unity on my system

And here is the custom menu I made for the launcher:

Unity launcher menus

See 15 Things I Did After Installing New Ubuntu 11.10 Oneiric Ocelot for how to make those and lots, lots more.

Initial video problems resolved

To begin with, I couldn’t even boot into Unity or anything. I had to boot into recovery mode and clear the path in various ways. I can’t remember exactly what I did but it involved wiping existing video drivers so I could even boot into Ubuntu 2D.

Had to get into recovery mode and purge the existing drivers. IIRC the file system was treated as being read-only and I had to remount as step 1 (nice and quick) before I could successfully make the other changes from root.

sudo apt-get remove --purge nvidia* fglrx*

[SOLVED] Going back to 10.10, Oneiric is a bust for me

I probably wiped /etc/X11/xorg.conf as well.

Once into Ubuntu 2D I was able to add proprietary drivers for nVidia and some combination worked and I was able to get Unity 3D working.

Booting into correct system

Want grub (grub2) to load my main system, not the test version I put in a new partition:

sudo grub-install /dev/sda

To change other grub settings edit /etc/boot/grub:

sudo gedit /etc/boot/grub

then edit the line –
GRUB_DEFAULT=0
to
GRUB_DEFAULT=4

save the file, then run
“sudo update-grub”

http://www.linuxquestions.org/questions/linux-software-2/changing-default-os-in-grub2-765011/

Re-ordering icons on launcher

In Unity 3D just drag them to the right then up or down and back in. In Unity 2D, hold for two seconds, then you can drag them around (http://ubuntuforums.org/showthread.php?t=1709136).

Removing overlay scroll bars

sudo apt-get remove overlay-scrollbar liboverlay-scrollbar-0.1-0

Things To Tweak / Fix After Installing Ubuntu 11.04 Natty Narwhal

Adding the system load indicator

Network, Memory And CPU Usage Indicator For Ubuntu: System Load Indicator

Adding a memory load indicator (useful when running a virtual OS at same time)

Things To Tweak / Fix After Installing Ubuntu 11.04 Natty Narwhal

Restore debugging for Netbeans

sudo gedit /etc/php5/apache2/php.ini

Find php.ini using phpinfo() then edit it thus:


xdebug.remote_enable=1
xdebug.remote_handler=dbgp
xdebug.remote_mode=req
xdebug.remote_host=localhost
xdebug.remote_port=9000

Next

sudo gedit /etc/apache2/apache2.conf

ServerRoot "/etc/apache2"
ServerName localhost

See Xdebug restored on Lucid for Netbeans

sudo /etc/init.d/apache2 stop

sudo /etc/init.d/apache2 start

sudo gedit /etc/php5/conf.d/xdebug.ini

xdebug.ini was correct:

zend_extension=/usr/lib/php5/20090626+lfs/xdebug.so

This folder did exist.

SQLyog problems

Managed to get the automated synchronisation working by deleting ~/.wine, reinstalling WINE, and reinstalling SQLyog (having saved

but the main system was flaky and crashed when displaying the results of a connection (amongst other things). The following gave a clue that WINE was involved: Mouse offset problem when using a WINE application maximized Downgraded from WINE 1.3 to 1.2 and the problems went away.

Also had to handle this when upgraded SQLyog: wine: cannot find L”C:\\windows\\system32\\plugplay.exe”. Fixed by making a copy of system.reg and wiping section on plugplay.

Adding an icon to the launcher involved the solution from How can I edit/create new launcher items in Unity by hand?

  • Right click your desktop
  • Select Create Launcher…
  • Create the custom Launcher as you want to.
  • Open your Home Folder. Press Ctrl + H to show hidden files if necessary.
  • Browse to .local/share/applications
  • Drag and drop your Launcher from Desktop to that folder.
  • Now drag and drop your launcher from .local/share/applications to the Launcher Bar on the left on your Screen.
  • You can now delete your custom Launcher on the Desktop if it’s still there.

DVD playback even if using CSS encryption

sudo /usr/share/doc/libdvdread4/install-css.sh

Making Dash Searches Better

Keep Files From Showing Up In Unity (Dash) Or Other Programs That Use Zeitgeist With Activity Log Manager


Misc Links

Don’t forget to check your RAM

Experiencing strange, intermittent faults on your computer? Don’t forget to check for a basic hardware problem such as faulty RAM before doing a lot of time-consuming testing of software installation and settings. If you are fortunate enough to be using Ubuntu (maybe using a Live CD or USB stick), it is easy to run memtest86 (assuming you are using a computer with an x86-compatible processor) and see if there is problem with your memory. Run it looking for patterns of bad RAM because you might be able to sidestep them. To display error reports in a useful format do the following once memtest has begun:

c for configuration
4 Error report mode
3 for Bad RAM Patterns
0 for continue

Let the system do multiple passes to be confident you have picked up any intermittent errors. This may take an hour or so. If bad RAM is detected and it is not too extensive, you can edit /etc/default/grub to sidestep the bad parts.

E.g. sudo gedit /etc/default/grub

Uncomment the example and use your own details as per the memtest output:

#GRUB_BADRAM=”0x01234567,0xfefefefe,0x89abcdef,0xefefefef”

Don’t forget to run the following afterwards to update your booting:

sudo update-grub

Escaping Ubuntu Unity (for now)

Don’t get me wrong – I’m really looking forwards to what Unity will become (if Canonical plays its cards right). But it is a mixed experience for users at the moment. A friend of mine upgraded his laptop from Maverick to Natty and had some serious problems. Unity had worked at first (although he preferred the old interface) but then it stopped. The launcher and the panel vanished and he needed some help escaping Unity and using the Ubuntu Classic (Gnome 2) interface. Unfortunately, he wasn’t able to simply log in and change to Ubuntu Classic as per HowTo: Disable Ubuntu Unity Interface.

The first thing I suggested was that he follow the instructions at Missing top and side panels in Unity, Natty Troubleshooting. Great! It worked and now he could interact with the system much easier. The sharks were backing off ๐Ÿ˜‰ (See http://xkcd.com/349/).

But how could he get the system to let him log in using his name and password? For that I needed the control panel. The easiest way to get that seemed to be via the terminal with the command:

gnome-control-center

Once there I could select the default log in session:

Change default log in session

Success!

While I’m at it I should add a couple of opinions about Unity. Why not? Everyone else is ๐Ÿ˜‰

  1. Canonical needs to give users the option of Ubuntu Classic (Gnome 2) for a few releases more than intended. Depending on how Unity works with dual widescreen monitors I may need Gnome 2 for quite a while.
  2. Users need to have a few configuration options easily available – e.g. how to remove the overlay scroll bars**
  3. Unity could be awesome and I think it will be a great option within a couple of releases. See a reasonably balanced review here – Riding the Narwhal: Ars reviews Unity in Ubuntu 11.04 I am already trying out Oneiric Unity on my notebook so I’m not a hater.

**
At the moment you have to do the following:
sudo su
echo "export LIBOVERLAY_SCROLLBAR=0" > /etc/X11/Xsession.d/80overlayscrollbars

from How To Disable The Overlay Scrollbars In Ubuntu 11.04 [Quick Tip]